.png?width=280&name=SameDayShippingGuarantee-New%20(1).png "Same-Day-Shipping-Sprayer-Depot")


Last week we talked about our recent Repair and Service Department expansion. We are so proud of being able to offer our customers even more options when it comes to repairs and maintenance on all of your spray equipment, parts and accessories.
However, we also understand that there are some repairs that are easy enough to take on by yourself. DIY repair projects can reduce your downtime and avoid repair fees by simply ordering the replacement part needed and following our helpful instructional videos.
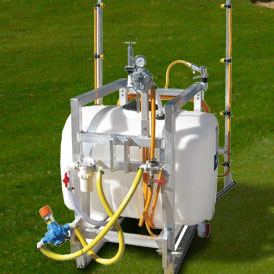
This time around we are featuring a spray gun repair. The Greensmaster JD9-C spray gun* comes standard in most of our Kings Sprayers. It’s one of our preferred spray guns due to it being great quality, heavy duty and able to achieve a maximum pressure of 800 psi.
If your trusted spray gun is suddenly leaking, replacing the O-rings will usually fix it.
For this project you will need the following tools:
- 10 millimeter socket
- 10 millimeter wrench
- Pick
- Flathead screwdriver
- Phillips screwdriver
- Crescent wrench
- O-Ring Kit
Let's get started! Follow these steps:
- Remove the nozzle
- Remove the O-ring located inside the nozzle
- Replace it with a new ring that matches its size
- Use the Phillips screwdriver to loosen the set screw to remove the barrel
- Remove the O-ring with a pick and replace it with a new one of the same size
- Use the crescent wrench to loosen the barrel nut to remove the inner barrel
- Remove the Teflon seat and replace with new one
- Use the 10mm wrench to remove the outside nuts to remove the trigger fixture
- Use the crescent wrench to remove the nut in the back of the spray gun
- Remove the O-ring and Teflon seat inside using a pick and replace both
- Tighten the rear nut
- Now, time to put everything back into place, replace the spring fixture and then tighten back the inner barrel using the crescent wrench
- Use the screwdriver to tighten back the screw in the outer barrel
- Add the nozzle and make sure it's secured
- Place the trigger fixture back into place and tighten all the nuts
- Replace the second rear nut to adjust the spray and you are done!
Watch the instructional video below for an even easier guide to follow:
 leaks or if your pump won't run or won't shut off then you might need to replace the pressure switch. Replacing the switch is an easy and inexpensive DIY project that will save your equipment unnecessary downtime.