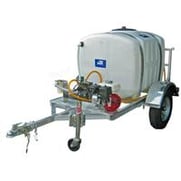
Winter will be here soon, and for much of the country, that means snow, ice, and freezing temperatures. Before the severe weather arrives, it's essential to ensure that your equipment is ready. One task that is vital and easily overlooked is the winterization of your sprayer before you put it away for the season. Winterizing your sprayer, like any regular preventative maintenance, will protect your investment and make certain that your sprayer is ready for the next spray season. Protecting your sprayer from freezing temperatures will make it last longer and is a quick and simple process, completed in just a few steps.
1) Flush the System With Clean Water
Thoroughly flushing your sprayer with clean water will remove any residual chemicals and eliminate any buildup. Even a small amount of residue can become sticky or harden, damaging the inner workings of your sprayer.
2) Drain the Tank
Open all the valves on your sprayer and blow compressed air through the system to ensure that the entire system is clear of any liquid.
3) Briefly Run the Pump
After clearing your system with compressed air, run the pump just long enough to ensure that no water remains behind.
4) Use Antifreeze
Dilute antifreeze with water or windshield washer fluid to create a 50/50 mix and run it through the sprayer long enough for it to reach all hoses, booms, and components.
5) Store Removable Parts
Remove and store parts, such as guns, nozzle tips, and strainers, in a clean, dry location.
6) Cover Openings
Cover any openings on your sprayer to prevent foreign objects, such as dirt or insects, from entering your equipment.
7) Wear Protective Gear
Personal protective equipment is a must when working around any pesticide, herbicide or other chemicals and the winterization process is no different. Protect yourself by limiting the amount of exposed skin with a long sleeve shirt, pants, and gloves. Wear a respirator or mask and remember to always protect your eyes.
To learn more about this or any other spray equipment issue, contact us today.

.png?width=280&name=SameDayShippingGuarantee-New%20(1).png)


